Showing posts with label beans. Show all posts

Tuesday, May 22, 2012

Recipe: Southwestern Bean & Chicken Soup

This soup is super fast and easy once your beans are ready. The spice is easily adjusted at the table with your favorite hot-sauce, and the salsa cooked in gives a wonderful tangy flavor. Also, adding the salsa means that there are no fussy things to cut up - so it is a great one to get a young child to help with!

Just the right soup for a rainy spring day - light and warm.
I used Lonesome Whistle's Arikara beans. They are a nice white bean that hold their shape really well in longer cooking projects such as soup. They have a balanced flavor that (so far) goes with everything. It's been nice to be back at the Farmers Market and seeing Kasey, talking beans and grains with her, and looking over her booth. It is more luscious and full each year.

Anyway...recipe!

Southwestern Bean & Chicken Soup

3-4 cups soaked and cooked Arikara beans (or another white bean)
1-2 cups cooked chicken pieces (this is a great thing to do with leftovers from a whole roasted or rotisserie chicken)
4-5 cups chicken broth
1-2 jars of your favorite green salsa
2 tsp. cumin
1 tbl. corn or tapioca starch
Salt & pepper to taste
1/2 cup chopped fresh basil or cilantro

This is so easy it feels like cheating. In your soup pot, combine the broth, beans, and chicken. Bring to a simmer. Add the salsa. Pull out a little broth (2-3 tablespoons should do it) and whisk in the starch and cumin till there are no lumps. Gently stir it back into the soup. Allow to simmer and thicken. Just before serving, add the basil or cilantro.

Serve with corn chips, sour cream, green onions, and your favorite hot sauce.

Tuesday, April 24, 2012

Recipe: Bite the Bullet Chili

The Dutch Bullet Beans  from Lonesome Whistle have such a great smokey flavor that they are perfect for chili... I was sure. And then I thought of the name and knew a recipe had to be born.

Usually we make chili with darker red or black beans and lots if steak, sausage, and other meat. But I didn't want such a heavy chili, feeling like too much would overwhelm the beans. So without further rambling...


Bite The Bullet Chili

1 lb. ground beef
2 cups dry Dutch Bullet Beans
1 onion
2 cloves of garlic
*Spices to taste
2-3 cups water or broth
3-4 leaves of kale or chard (optional)
Salt and pepper to taste

Prepare your beans - soaking, rinsing, par-cooking, to suit your preference. If you put them in the chili dry, add some cooking time!

Chop the onion and mince the garlic, sauté till they are transparent. Add the beef and brown slightly. Add spices.

*I used some mild New Mexico green chilis from a friend and a touch of red chili. With the name, I really wanted to make something spicer, with a nice kick, but I was cooking for kid palate and Brother-Bug hates all things with any spice at all. I contented myself with adding personal kick later when serving. Beyond the chilies, I put in some cumin, oregano, and just a dash of nutmeg.

Add the bean with the water or broth. Use just enough liquid to barely cover the beans if you want a thick chili, more water for a thinner product. Cover and bring to a boil. Turn to low and simmer till the beans are done - check the water level every 20-40 minutes, adding more water if needed.

Just before it was done I chopped up some chard that needed to be used and threw it in. It was a nice addition but made it feel less like true chili. That's your call. I like getting greens into anything and everything the kids eat. 

Adjust flavors with salt, pepper, more chili...

Serve with cornbread or corn chips and sour cream.

It all was consumed before I could take a picture - so make it yourself and find out what it looks like!!

===

A side note on bean substitution:  Dutch Bullet Beans are a very specific heirloom bean. With Rio Zape beans you can use a dark bean to substitue, with Calypso beans a white... your final product will taste a little different because the flavors of heirloom products are so pronounced, but it will be similar enough. The Dutch Bullets have such a special flavor that I don't know what could possibly substitute. If you find something that you think would be a good match, let me know!

Tuesday, March 6, 2012

A Yummy Bowl

Here is the Willamette Valley we have a local chain called Cafe Yumm. Their Yumm Bowls make up a fair part of the kids eating-out experience. They key is their amazing Yumm Sauce. Tasty.

But we can't afford to eat out often, and I love to make things myself. A dear friend gave me her recipe for what she calls Yummish Sauce. Be patient, we will get there.

A Yumm Bowl spread is a great thing to serve to large groups of diverse eaters, especially when kids are involved. It's super basic and pretty much infinitely adjustable. It falls into the 3 Gs without any effort at all.

Here we go, from the bottom of your (large) bowl up:

Greens of some kind - mixed salad greens, cooked kale, chard, or collards, spinach, steamed nettles, steamed broccoli....

Cooked grain of some kind - brown rice, millet, quinoa, wheat berries, barley, corn chips.... Or skip the grain if you don't do grain.

Cooked beans - our last bowls had Lonesome Whistle's Rio Zapé beans. So good. But any bean will do. Black, white, red, pinto, cranberry, garbanzo...

(You begin to see how infinitely adaptable these are, right?)

Okay, that's the base. Traditionally this is vegetarian, but I've been known to throw in left over meat that was available - some slow-cooked chipotle goat leg was incredible. Extra taco or burrito meat, turkey, chicken, whatever. I think pulled meats work better than others, but that's more of an aesthetic choice than anything.

All kinds of other stuff goes on top:

Cheese
Sour cream
Green onions
Avocado
Salsa
Black Olives
Tomato
Fresh Basil or Cilantro
More greens
Jalapenos
Bell peppers
Anything else your imagination inspires you to try...

On top of all that, we slather on the Yummish Sauce. Mix it up (or not - your preference) and watch it get inhaled out of the bowls.

What? The Sauce recipe? But of course!

Yummish Sauce

This makes about 2 1/2 cups, which we will use up in a couple of days. However, it freezes really well, so making a little extra (or a lot extra...I usually make about a gallon at a time) and popping containers in the freezer means having a go-to snack and dinner option.

Blend in a food processor:
1/2 cup oil - I usually use Olive Oil
1/2 cup almonds
1/2 cup cooked and drained garbanzos
1/4 cup soy beans
4-6 garlic cloves

(I've successfully used cashews in place of the almonds, and other white type beans, like Arikara Beans, in place of the garbanzos and/or soy beans. Like the bowl recipe, this is only limited by your imagination and what is in your cupboard.)

Slowly add, one at a time:
1/3 cup nutritional yeast
1/2 cup water
1/3 cup lemon juice
1 tsp. salt
1 tsp curry powder
1 tsp. soy sauce or Braggs Liquid Aminos

(Here I have tried other herbs and spices. When Sister-Bug had broken her clavicle, I blended up a bunch of sauce with Comfrey tea and leaf for its bone healing properties. I plan on putting nettles into the next batch...and who knows what else!)

Blend well with each addition. Adjust the salt and spices as desired. Adjust the thickness with water and oil - I like to make mine like a thick dip, knowing it's easy to thin later and makes a nice dip or sandwich snack if it's a little thicker.

This is a guaranteed kid-pleaser...or has been with every kid I have ever fed it to!

Rio Zapé Bean Dip

I'd never made bean dip before. So, after tasting the dark and rich flavors of Lonesome Whistle's Rio Zapé beans, I thought it was time to give it a whirl. Here's what I came up with:


Rio Zapé Bean Dip
2 cups cooked beans - if you don't have Rio Zapes, try a black bean
1/4 cup chopped onion (or less - mine was a little to onion-ish)
2 cloves garlic
2-3 tbl lime juice
1 tsp each smoked paprika and oregano
1/2 tsp cumin
4-8 green olives
Cayenne or other hot pepper to taste
Salt to taste
Olive oil to blend

Put all the ingredients into a good processor - reserving the olive oil salt, and half the lemon juice. Blend well. Slowly pour in the olive oil while blending, checking the consistency often. When you like the consistency, adjust the flavoring with lemon, salt, additional green olives, and peppers.

Dip chips, add to nachos, sandwich spread?? Enjoy!

Monday, March 5, 2012

A Collection of Soup

Over at TidyMom they are collecting soup recipes. I think this is brilliant, because I love soup. There is a give away also, but my motivation is mostly my love of soup. I looked back over my posts and here are all the soup recipes I have posted about. All tried and true favorites - which one will you try?

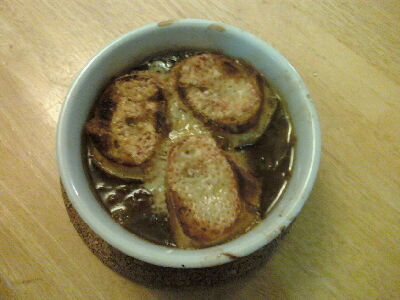
Almost-Instant French Onion Soup - this relies on the magic of a slow cooker. It's not instant in that you have to start it the night before. It is instant in that your total cooking time is 20 minutes with a food processor. And you end up with extra caramelized onions, which is always good.

*
*
*
Dinosaur Bean Soup - a creation I made when working with some heirloom beans from a local farmer. The first part of the post is about the bean and grain CSA that I belong to (and love). The soup recipe is near the end.

*
*
*
Sunshine Soup and Ham & Barley Winter Stew - two recipes in one post! The sunshine soup is a bright soup with all red, yellow, and orange ingredients that we made for Winter Solstice. The Ham & Barley Stew is just what is says it is. Both these recipes feature more heirloom beans and grains from my CSA. The flavors of these ingredients is amazing and worth tracking down if you have time and resources.

*
*
*
Summer Cucumber Soup - yesterday it was warm here, and sunny! We worked outside for a while, transplanting raspberry canes, and I got to thinking about all the tasty summer foods in the nearing future. This recipe is not appropriate now...but will be in just a few months. And SOOOO refreshing on a summer day!

*
*
*

Sweet Potato & Beef Stew - using that earlier technique of slow-cooker caramelized onions, I made this amazing stew a couple weeks ago. There is no picture because we ate it to fast. There were no left overs.

*
*
*
So those are the soup recipes I've posted here. I hope you try them out, enjoy them, and let me know. And really - give-away or no give-away, there are some amazing recipes in the Soupapalooza post I linked to in the beginning. This is the official line: "Come join SoupaPalooza at TidyMom and Dine and Dish sponsored by KitchenAid, Red Star Yeast and Le Creuset!" The give-away ends today, but that is no reason to ignore the cache of amazing recipes. Check them out.

Monday, February 13, 2012

Calypso Beans

Beautiful. Striking.
Of all the delightful items in the grain & bean CSA, I think the Calypso beans are my favorite. I was so happy to cook them up, and especially happy that they retain much of their color and pattern when they are cooked. I was a little worried they would be like red lentils - so pretty dried and so blah when cooked. But the black and white fades to ivory and charcoal grey and is still very striking.

Their texture is creamy and perfectly starchy; Kasey compares them to new potatoes. My batch didn't hold their shape as well, but I think I over cooked them or added too muck soda to the cooking water. They have the less robust flavor of a white bean, but more complex than your average white bean. Our tester bean-pot (beans, olive oil, salt, herbs) was heartily enjoyed by all of the family. Brother-Bug made some comments about eating the cow-beans.

The leftovers made into one easy lunch and one fabulous dinner.

For lunch I re-warmed the beans and tossed them with baby spinach and a generous amount of Gorgonzola. Simple. Divine. Deeply satiating. The warm beans wilted the spinach and softened the Gorgonzola, and the flavors merged in a wonderful way.

Cooked Calypsos - still so striking to look at.

Dinner was more complex than tossing some beans and spinach.

Delicata Squash Stuffed with Calypso Beans

3 Delicata squash (though probably any winter squash would work)
1 cup cooked Calypso beans (if you can't get Calypso beans, try a good white bean)
1 cup cooked brown rice
1/2 cup frozen peas
1/2 cup cream cheese
1 cup grated sharp cheddar
Salt, pepper & herbs to taste.

Preheat the oven to 400. Cut the squash in half and lay open side down in a baking dish with a little water. Cook until easily pierced by a fork, remove from the oven and reduce the heat to 350.

(Note: I always scrape squash seeds and strings after I bake them. The softened squash is far easier to work with.)

While the squash cools, mid the remaining ingredients together (reserving half the grated cheese) in a bowl - adjust for taste and personal desire. If I had been making this for adults, I think some red chili flakes would have been good, but that was not an option for my kids.

Scrape the seeds and strings from the squash. Leave the flesh intact. Fill and then over-fill the squash halves with the bean and rice mixture. Top with the remaining cheese. Place the squash in a baking pan and pop in I the oven until the cheese is all golden and good.

The only bummer here is that the cheese on top hides the beautiful beans.
 This squash is a balanced meal in itself, but a salad makes a nice accompaniment.

===

In other bean and grain news, I started a sourdough starter with half white flour and half Kasey's excellent whole wheat flour. I've never made my own starter before, so I am excited to see what happens and how it turns out.

Friday, February 10, 2012

So You Forgot To Soak The Beans?

So many beautiful beans in the world...
This is a perpetual issue for me - I can remember to get dinner going early enough, but I think I have remembered to give my beans am overnight soak maybe half a dozen times in my adult life. For years this frequently prevented me from cooking bean recipes.

Finally I read Mark Bittman's How To Cook Everything, in which he does not insist on pre-soaking beans.

"[The myth of soaking beans...] is the most egregious, and the most harmful , because it has given millions of people the idea that beans must be prepared well in advance. Although soaking speeds cooking, it does not do so significantly. If you soak most beans overnight you will shave fifteen to thirty minutes off the cooking time."
(Bittman; How to Cook Everything; pg. 500)

Equipped with his ideas I began to explore cooking beans in a satisfactory and short-sighted way that works for me.

Bittman's recommendation is to cover the beans with water, bring to a boil, cover loosely, and simmer (stirring occasionally) till done.

I tried this with several types of beans and found it worked, but didn't quite cook the beans to my taste. My adaptations work as follows:

Warm water in a tea kettle and pour over rinsed beans. Lid the soaking beans and let sit for 30 minutes or more. Strain and rinse.

Stove Top:
Put the beans, a teaspoon of baking soda (I use about one teaspoon per cup if dry beans - very approximate) and ample water in the cooking pan. Turn on high heat. Bring to a boil, reduce heat to medium low and simmer till the beans are tender. This should be between 30 and 60 minutes, depending on the beans. I never time them, but instead check them periodically.

Slow Cooker:
Place the beans, baking soda, and ample water in the slow cooker. I then turn mine to high for 6 hours. This might make my beans a little mushy, but I usually check them frequently throughout the day if I am home and turn the cooker off when they are done.

This works especially well with fresh beans, such as the heirlooms I have been playing with from Lonesome Whistle. And if you are cooking beans, make a double batch. Take half of the soaked beans and freeze them in their soaking water. They are ready to cook when you have even less time than usual!

===

As an aside, I highly recommend Bittman's book. It's an excellent go-to for any and (almost) all cooking questions.

Thursday, January 19, 2012

Adding To The Pasta Sauce

This is not my kid... I just love this picture.
Frequently spaghetti and sauce graces our table - as I'm sure it does on many other tables. It's fast, a reliable kid-pleaser, and fairly hearty. However, serving spaghetti, tomato sauce, and a salad does not include that essential G for Growing - protein. Not in any amount substantial enough to satiate a nursing mom anyway.

I was making pasta sauce the other night and hit upon the idea of using some cooked beans leftover from a previous dinner. The whole sauce was based around what I had that needed to be used - eggplant and what not. On the whole, it worked out really well. I could have added zucchini, spinach, or any other veggies if I had them. The beans and cream gave the sauce a richness and a velvety texture not usually found in a veggie sauce. Added benefit - the kids liked this sauce way more than they like plain red sauce!


Vegetable-Bean Pasta Sauce

In olive oil sauté
1 onion - chopped
3 garlic cloves - chopped
2 sm. eggplant - cubed
(other veggies would go here)
Basil
Oregano
Parsley

Add
15-20 oz. canned tomatoes
1 c white wine
1 c water

Cook until the vegetables are soft through.

Puree in a food processor with
1 1/2 cups cooked red or white beans (one can of beans would be fine too)
1 cup cream
Salt and pepper
Until everything is blended together. Adjust the thickness of the sauce with water reserved from cooking the pasta.

Pass with asiago.

Added possibility - adding extra beans and a half cup of asiago will make a thick Italian style bean dip! Tasty on bruschetta...

Monday, January 2, 2012

Two Soups for You

Though I haven't been doing much writing here, I have still been cooking, and cooking a lot! Partly holiday feasts and partly the exciting beans and grains, and mostly that we get hungry and must eat good food.

Among other things, I put together these two soup recipes and since both use ingredients from Lonesome Whistle, I wanted to share... And I really love to share the recipes I create. Recipe creation feel like such an art form, and one that benefits most when the recipes go out into the world.

===

Sunshine Soup

I made this with Brother-Bug and his best friend when we gathered to call back the light at the (close to the) Winter Solstice. We chose ingredients that were red, yellow, and orange to help us see the return of the sun. It was a good match with an Irish Soda Bread and some broccoli. We shaped the bread like a sun, and the broccoli represented the coming summer trees. It was a tasty and magic meal!

Soda Bread Sunshine!

1/2 Butternut squash
3 carrots
5 c water
2 T veggie bouillon

Cook squash, carrots, water and billion till the carrots are soft. Blend or mash till smooth.

Add to the soup purée:

1 1/2 cups Vermont Cranberry beans, precooked
1c frozen corn
About a teaspoon each of powdered ginger & mustard
1/2 teaspoon grated nutmeg
Salt and pepper to taste

Heat through till the corn and beans are warm and the spice flavors have mingled a bit.

Serve and enjoy. Sing "Here Comes the Sun".

===

Ham & Barley Winter Stew

Close up of Purple Barley - gorgeous, right?

1 ham hock
1 cup purple barley
2 sweet potatoes, cubed
1 white potato, cubed
2-3 tablespoons smoked paprika
Water to cover
Bay leaf
Parsley
Salt & Pepper

I made this in my slow-cooker - any excuse to use the Christmas present, right? I put all the ingredients in, covered them with water, and cooked it on high for about 5 hours. Before serving, pull out the hock and strip any clinging meat into the stew. Adjust the seasoning.

Serve with crusty bread.

===

I'm thinking of grinding some of the Dakota Black Popcorn in my grain mill, and seeing how it comes out as cornbread....

Thursday, December 15, 2011

CSA pick up number one and a quick dinner

I was so excited as I opened my bucket of goodies from Lonesome Whistle Farm; the kind of anticipation my kids are feeling about the impending holidays. Flour! Barley! Beans! Oats!

Thursday after delivery was an unusually busy Thursday, with us rolling in late from errands due to a birthday party. I knew we would be snacking and enjoying cake and coconut ice cream, so something simple for dinner was key.

Bread.
Beans.
Greens.

Brother-Bug chose the Vermont Cranberry beans and I set them in some warm water for a quick soak. Because the beans were so fresh they started to plump up right away.

Personal Disclaimer: I never remember to overnight soak my beans. I have, therefore, become adept at cooking dry beans fairly quickly without a pressure cooker. More about that in a future post.

A fuzzy picture of soaking beans.
After a couple of hours soaking, I rinsed the beans, added fresh water, and set them to boil, then simmer. They smelled divine and wonderfully bean-y while they cooked. I turned them off after about a half hour and left them. We ran errands and went to the birthday party. When we got home, while the bread was baking, I turned the stove back on and reheated the beans. Strained, mixed with olive oil, salt, pepper and thyme, they were ready to eat.

Onto the bread.

I like yeast breads better than quick breads, but I didn't have time for a long rise, punch down, and rise again. I was on a major time line. I adapted the Master Recipe from Artisan Bread in Five Minutes a Day as follows:

Measure 1 1/2 cups warm water, 1/4 cup honey, and about a tablespoon of yeast into a bowl and let sit till the yeast is going. If you've made bread before you will know what I mean.

In a large mixing bowl combine:
3 cups flour (I did one of the Rye flour, one and a half of the Whole Wheat, and a half cup of organic white flour to lighten the texture a bit)
1/2 tbl. salt

Add the water/yeast/honey, beating vigorously with a wooden spoon. The dough will be very sticky. Don't knead it. Don't add more flour. I swear. Cover the bowl with a towel.

Let it sit until you are ready to preheat the over (to 400 degrees). At least an hour, longer is okay too. Once you set the oven to heat, flour your hands and form a quick round loaf. Don't try for anything super artistic, just make a basic loaf shape. Cut a couple of slashes in the top with a sharp knife. Let it rest while the oven finishes heating.

I bake my bread on a pizza stone, but a cookie sheet will work too. Make sure you set your resting loaf on coarse corn meal so you can move it around easily.

When the oven is hot, put the bread in and bake for... I forgot to look at the time. Darn it. I baked it till the crust was turning a little golden and the bread made a hollow thump when I tapped the bottom.

Cool and slice. Eat!

That was the bread.

As I stated, I re-warmed the beans and baked the bread when we got home. I sauteed some kale. That was it. And it was good. It was eaten up by all family members, even those who had recently gorged on cake.

The Vermont Cranberry beans are almost aromatic in flavor - the same way the nuttiness of an almond is aromatic and still nutty. They don't taste like almonds...it just struck me as the same kind of rich and subtle flavor, if not the actual same flavor. Their texture is smooth and starchy-creamy. Satisfying. Filling. And they are so rich in both flavor and texture that they didn't need more than the oil, thyme, salt, and pepper I tossed them in. Even that could have been too much. I am excited to try them in a recipe and see how they stand up to other flavors.

Papa-Bug expressed it best: 
"If beans were like this people would eat them."
Such a pretty, simple, satisfying meal...
And he's right. These beans are much more than just a burrito filler, to be covered over with other flavors. If I could always eat beans like these I would eat beans far more often. Thank goodness for the CSA!

The bread, the flavors of the flour... Wow. I wanted to keep eating it even after I was full. It was a dense bread due partly to the whole-ness of the flour and the short rise time, which was what I wanted for our dinner. It was a little sour and a little savory and rich of that nutty flavor that is an essential part of fresh wheat. Warm with butter... YUM!


===

A couple of nights later I threw together this recipe which was a hit with the whole family. I made this up out of a moment of indecision - wanting to cook with all the lovely things from Kasey and not knowing what to choose!

1 cup Arikara beans
1 cup Vt. Cranberry beans
1 cup purple barley
1/2 cup dried mushrooms (I used chantrelles - and if you soak them separately you can use the soaking water in your broth)

1 tbl. olive oil
1/2 onion
2 cloves garlic
2 bay leaves
3-4 cups broth (I used a mixture of water and chantrelle broth)
1- tsp. dried thyme or marjoram
1-2 cups frozen corn
Salt & Pepper

Soak the beans, barley and mushrooms for about an hour. In a soup pot, Saute the onion and garlic in the olive oil. Strain the beans and barley, add to the pot with the mushrooms, broth, bay, & thyme/marjoram. Bring to a boil and reduce to simmer till the beans and barley are done. Add the frozen corn and continue to cook till the corn is warm through. Salt and pepper to taste.

Enjoy!


Friday, December 2, 2011

Meet Our Farmers: Lonesome Whistle Farm

We are getting ready and excited for the first delivery from our Lonesome Whistle Farm Grain & Bean CSA. While we wait, I thought I would bring you a post highlighting Kasey & Jeff, and some of what they are doing. My earlier post about Black & White Popcorn balls was also graced by Lonesome Whistle harvest.

Growing fields of beans.
This post is an interview with Kasey White. She and Jeff are the ones growing us such good beans and grains. One of my favorite things about shopping at my Farmer's Market is developing relationships and deepening my understanding about food and where it comes from. Getting to know Kasey, hear her passion for garlic, and see her wonderful bean jewelery has been a delight.  

An heirloom bean from the Mega-Whole-Nutrition-Style store might be tasty, but one that my friend and community member grew will always taste just a little better to me. I know that it is mostly in my mind, but that's okay. I love the warm feeling I get eating foods that came from friends. 

That said, let's meet Kasey, Jeff, and their lovely 

Tell us a little about your farm...how big is it? What do you grow? 

We grow beans, grains, corn, and vegetable crops on 20 acres.  We are located 9 miles north of downtown Eugene on River Road.  

When did you start farming?

We started farming in 2003 on 2 acres and have been on 3 different farms in our 9 years.  We just secured land with the help of some investors and will be putting roots down on this farm, very exciting.

 Why did you start farming?

We have a food justice and social activism goal with our farming.  We wanted to do something meaningful and direct with our lives and provide healthy food for us and our community with the goal of becoming less dependent on corporations to meet our needs. 

Some of that hard work...Brother-Bug loves this!
What is the hardest thing about being a farmer?
The work never stops.  You are always thinking about what the next step is and problem-solving.  Often, we are using equipment we have no experience with and old equipment at that.  Like a combine from the 1970's and cultivating tractor from the 50's.  You have to be on your toes and a jack of all trades to do it well.  It's hard being "on" all the time. 

What is your favorite thing about being a farmer?
Making my own schedule and the quiet time in the field to have my thoughts to myself.  Not punching a time clock, and being creative.  We see farming as an art form.   

Why grow heirloom beans and grains? Why should we buy them?
We grow heirloom seeds because they are open pollinated, old varieties that are interesting and resilient.  They are not available through the industrial food system, and many of the varieties have outstanding taste and characteristics.  We keep discovering new and beautiful beans and corns that we can't resist to grow out each year.   

What is your favorite thing to grow?
Jeff's favorite is corn.  We grow Dakota Black popcorn and other dent corns.  I love the beans personally.  I love them so much that I am making jewelry out of them.   

Of the things you grow, what is your favorite thing to eat?
Bean burritos are Jeff's favorite food of all time.  He eats two large ones a day, in fact.  I love to eat beans too, but love making my own bread with our grains and using our vegetables too.   

Share a favorite recipe?

The beautiful booth at the Lane County Farmers Market in downtown Eugene.
My basic pot of beans is seasoned with rosemary, thyme, olive oil, and salt and pepper.  Really simple. 
 
Besides signing up for a CSA share, what can community members do to help local farmers?
The best thing to do is come to farmers market or become a CSA member and offer support to farmers through your consistent buying, eating, and enjoying of their foods.  Small gestures go along way in the middle of a stressful farm season.  

If we wanted to come visit the farm, how would we go about it?

We would love to show you the farm! Because of our schedules, please call or email in advance of your visit to make sure we are able to show you around. 
You can contact the farm here. 

Who wouldn't want to eat beans and grains grown by such loving and beautiful people?

Thursday, October 13, 2011

Blogging About Beans

I have a farmer friend named Kasey White, of Lonesome Whistle Farm. They grow amazing garlic, assorted tomatoes and etcetera, and heirloom beans & grains.  They also grow black popcorn, which is really exciting and a perfect Halloween treat!

Look closely at the amazing colors of all those beans!
Their farm offers a CSA for their beans and grains, and I am so excited to be on the list of CSA Members. I am doubly excited because I am working off part of the cost of my share by featuring these tasty foods, and creating recipes for them, all to be exhibited here on my blog. I like this arrangement because I love to work for food, I like the challenge of new recipes, and I want to help support farmers - especially farmers who are trying to grow heirloom species and keep bio-diversity alive.

The CSA starts officially this month, and to start us off, Casey gave me a little bag of "Ireland Creek Annie" beans from last year's harvest. Lonesome Whistle didn't grow this bean again this season, so we will have to look elsewhere for it... because it was really, really tasty.


To start learning about heirloom beans, I'm going to cook each one as a plain bean before I attempt any recipes. I had heard Kasey say that heirloom beans have more complex flavors than the regular old black bean or kidney bean you buy in the store, so with the Ireland Creek Annie beans, I set out to test that assertion.

Beautiful beans. Gorgeous garlic.

These beans are a "white bean", of the kind you might use in baked beans, or a simple bean soup (keep reading if you like the soup idea...).  With half of the pound we soaked them in warm water, and cooked them at a simmer on low for a while.

(In the future I will give better, more detailed information about my cooking process...promise.)

Sister-Bug examines the dry beans.
Anyway. They had a soak and simmer until they tested done.

I mixed them with a little of Kasey's garlic, some butter, and some parsley... and of course a touch of salt and pepper. Just plain beans.

And what do you know! They were way more flavorful than most beans I have eaten. The garlic and the butter were good, but these beans could have stood alone as just a simple bean and still been very enjoyed by our family.

Their texture was smooth and a little starchy, and the flavor was nutty. One thing I have noticed about other heirloom foods I have tried, and these beans are no different, is that they taste like the "normal" incarnation of the food (white beans in this case) only more so. These beans were "beanier" than my usual white beans.

When cooked, they retained their color and shape better than my usual bean. There were few of the exploded or mushy beans mixed in, and they held up well when I was stirring in the butter and garlic. 

They were a huge hit with my family - everyone eating them up with alacrity.

Beans, garlic, butter... Bon apetit!
 With the second half of the pound, I wanted to see how they fared in a more flavorful recipe. I invented

Dinosaur Bean Soup

It comes by its name from the addition of Italian Kale, which my family thinks looks like something a dinosaur might eat or wear.

1 large leek - coarsely chopped
1 celeriac - peeled and cubed
1/2lb bacon - cut into chunks or bits
1 bay leaf
2 cloves garlic - minced
1/2 lb Ireland Creek Annie beans - pre-soaked (or other white heirloom bean)
1/2 by Italian kale - coarsely chopped or torn
4-ish cups of water
Salt and pepper

Heat a large soup pot. Add the bacon (we used Deck Family Farm Lamb Bacon, which has a flavor like no other. If you haven't tried Lamb Bacon, I think you should. Unless you don't eat lamb...). I usually take scissors and snip the strips into 1/2 inch pieces as I add it to the pan. Cook for a couple of minutes to let the fat coat the pan, then add the leek, celeriac, bay leaf, and garlic. Cook for until the bacon is just beginning to crisp.

Add the soaked beans and water. Cover and simmer for about 40 minutes. Check the beans a couple of times. If you have pre-cooked your beans, you need to just heat the water and everything thoroughly. Just before serving, add the kale, stir, and wait a few moments for the kale to wilt.

(To make a vegetarian version, omit the bacon, saute the veggies in olive oil, and add 1/2 tsp. veggie bullion to fill out the missing bacon flavor.)

Serve and enjoy. This is good with crusty bread.


Sister-Bug gives these beans her hungry toddler award. She wouldn't stop eating them!
Keep checking back for more bean recipes, information about heirloom beans & grains, and other related content. And go to your Farmer's Market and find a heirloom bean farmer, because if these beans are any indication, you will not be disappointed!

Thursday, May 26, 2011

Math Beans

Here in homeschooling land we look for different ways to play and learn, so as to engage as many part of our brains as possible. For math, we really like the skill building over at IXL, as well as cooking, helping with shopping, general counting, and other similar tasks. This week I also made a Math Bean Game, with the help of a few beans and 2 egg cartons. It is basic, almost free, and nicely hands-on for a little person.


(You can click on the picture to get a clearer shot of our game.)

With a marker, write the numbers 1-12 in the first egg carton. Then 1-6 on each side of the second egg carton. In the second carton put the correct number of beans in each side, using two different kinds of beans (we used pintos and garbanzos, but you could also use 2 colors of beads, or marbles, or what ever). That's it. Now play! 
One way to play: take the beans from a #2 slot and put it in the #4 slot. How many of the other kind of bean do you need to make 4? 

Obviously you can do whatever numbers you want to do. You can add, subtract, work forward, work backward... all kinds of math play is possible with this practically free game!