Showing posts with label dinner. Show all posts

Thursday, August 2, 2012

Recipe: Broiled Lamb Chops with Fresh Herbs

I concocted a recipe for broiled lamb chops the other night. It was wonderfully fresh for a summer night - but I did heat up the kitchen quite a bit with the broiler. When I pulled the packs of Deck Family lamb chops out of the freezer, I pulled a pack of goat chops too on accident. I cooked them both up anyway and found out that 1) this recipe works well with Lamb or Goat, and 2) a side-by-side comparison of the two meats was really interesting. The Lamb is super tender and rich, the goat is somewhat tougher but has a more complex flavor.

The measurement of the garlic is best determined by the cook. Our family loves garlic, so I put in the full 6 cloves. However, because of the way the herbs crisp during the broil, the garlic retains almost all of its fresh spice. One option would be to lightly saute the garlic before mixing it with the oregano, another would be to use less garlic. Also, because of the final broiling step, I'm not sure that this could transfer to the grill, but possibly someone with more grilling expertiese could figure it out.


Broiled Lamb Chops with Fresh Herbs

8 Lamb (and/or Goat) chops
Worchestershire sauce
Fresh squeezed lime juice
Salt & Pepper
2-6 cloves of garlic
3-4 tbl. fresh oregano

Defrost the chops and sprinkle them with the lime and Worchestershire sauce - I didn't measure this, but just made sure that each chop had a drizzle. Marinate at least 45 minutes, flipping them over and redistributing the juice about halfway through.

Heat your broiler for at least 5 minutes. Mince the garlic and the oregano and combine, setting aside for now. Spread the chops on the broiling pan. Sprinkle lightly with salt & pepper. Flip over and sprinkle salt and pepper on the second side.

Broil, close to the heat, until the meat browns and the fat begins to carmelize. Remove from the oven and turn over. Spread the garlic-oregano over each chop evenly and broil again for 5-7 minutes. Fully cooked (medium-rare) lamb or goat chops should register an internal temperature of 145F.

We served this with cous-cous, salad, and roasted sweet potatoes. Super tasty and super easy - my favorite kind of cooking.

Wednesday, July 18, 2012

Recipe: Spaghetti Carbonarra with Lamb Bacon

It amazes me that two years ago, I didn't even know that Lamb Bacon existed. It has won its way into my heart as a favortie meat product. I don't know where to buy it, aside from the Deck Family Farm, but if you are a bacon lover and in the Willamette Valley or Portland area... WOW. Try it out! It is intesnely flavorful and wonderfully fatty. It makes a killer BLT (especailly now that the tomatoes are getting ripe).

I wish I could upload the flavor for you. So very decadent

But our favorite thing to do with it? Carbonarra.


Frequently, Carbonarra is made with pancetta or proscuitto. Often people use pork bacon as the meat, but a good pack of Lamb Bacon really makes this dish something special. As a bonus, it's almost laughably simple to create.


Spaghetti Carbonarra with Lamb Bacon

Amazing ingredients for amazing dinner.
1 lb. Lamb Bacon
1 lb. fesh pasta (preferably a larger noodle like linguini. I used egg linguini from Pasta Plus.)

4 egg yolks
3/4 cup heavy cream (like the amazing raw cream from the Deck's Creamy Cow Share. Yum.)
3/4 cup parmesan, plus extra to sprinkle
Salt and Pepper to taste


Chop the bacon into small pieces and fry. Pull out of the grease and set aside. Save the grease - you'll need it later and want the leftovers for something else good.

Cook the pasta to al dente.

While the pasta is cooking, whisk the egg yolks, cream, and parmesan together. Drain the pasta and mix with the dairy sauce over low heat till the sauce thickens and clings to the noodles, about 3-5 minutes. Add the bacon and 2-4 tablespoons of reserved grease, mixing throughly. Season to taste with the salt and pepper.

Serve with a light salad or other veggie. Clearly this meal is the best kind of calorie fest, so keep your sides very light and simple. The Lamb Bacon has such a rich flavor you don't want to try and compete with it.

Also, if you do this and splurge on the Lamb Bacon... Go All The Way. Get really good pasta, cream, and eggs. Get local and raw if you can. I swear you will not be disappointed. It's worth it.


Thursday, May 31, 2012

Best Idea Ever: Dinner Swapping

The night off saves me from instant & take-out food!
I really, really love to cook (I don't know if you had noticed...) and I really, really love to share food and recipes with people. But preparing dinner 7 nights a week is a lot of thinking and working and time consumption. Several years ago we had excellent neighbors and we all loved to cook.We concocted the idea of dinner swapping - it's probably not an original idea but we did come up with it on our own. Ultimately we wanted to eat together more often, but it wasn't practical with our situations. So we traded weekly dinners. When they moved, I started trading with a different neighbor. When we moved, eventually I found a new neighbor to trade with. That means I'm on my third set of dinner partners now - always due to moving, never due to the arrangement not working.


Here's how it works...Extremely well. 

Details?

Each of us picks one night of the week that we have relatively free. On my cooking night, it is my responsibility to prepare dinner for my household and my neighbor's household. On their cooking night, I put my feet up, knowing dinner is being prepared (well...I don't actually put my feet up, but I do get to not think about cooking just that one night...tonight I'm writing this blog post when I otherswise would be cooking). We trade dropping off and picking up as it is convenient for each household.

Things to consider:

1) Keep it in your immediate area so that drop-off/pick-up is easy. If your swapping friend is across town, you're giving yourself another errand. Swap with someone in easy walking distance.

2) Make sure you have similar diets - they don't need to be exactly the same, but everyone should enjoy good food. A household that relies on Cayenne as a staple flavor might not pair well with a household that can't stand spice... Likewise very concientious vegetarians might feel uncomfortable with their meal being cooked in a house where meat has touched every pan.

3) Don't tally or keep track too closely. People go out of town, people get ill, life happens. Skip when you need to skip, keep trading, and trust that it will all work out.

4) Write down strong food preferences for the folks who will be cooking for you. Everyone should know if there are any allergies or food sensitivities. Also if there are strong dislikes that will ruin a meal for someone.

5) Find a way to keep track of the other households dishes and containers you receive your meal in - otherwise you will end up with extra random stuff floating around your kitchen without a home. And keep track of your own too - know what you send over so you can get it back.

(Funny side note on that - in my current trade there is a 13x9 baking pan that I'm pretty sure is not mine and she is pretty sure is not hers. What?)

===

Some of the benefits I've noticed:

*I can get my kitchen super clean on the other household's cooking night, and not worry about cooking dishes messing it up. I can just enjoy the clean for an evening.

*Cooking for someone else makes me think outside my usual fallbacks because I want to show off a little. I want to challange myself and having an "audience" helps me do that. I cook better these nights!

*A couple of the households I have swapped with had similar tastes in food, but very different diets. My current swap is mostly paleo (for one of the members), so I get to learn about new diets, cooking ideas and methods. This further challanges me to think diferently than my traditional cooking habits and learn new things. I love that!

*Cooking an extra dinner is not really much extra work. I'm cooking anyway and doubling is not hard. In fact, it's more than a trade-off for having a  night off cooking & thinking about feeding my family that doesn't cost me the increasingly expensive price of take-out. Because it's a swap, buying extra ingredients doesn't actually increase my food budget at all, since I pay nothing for the wonderful dinner delivered to my door.

*I love the element of surprise...4 blocks away, something tasty is being cooked for me. And when it shows up it's always exciting to see what we get to eat. I can't remember ever being disappointed.

===

I think you should try this out if you can. Find a near-by friend and trade a couple meals. Share recipes, taste test new things, build that neighborly connection, and eat well. See where it goes. How can you improve upon my idea?

Recipe: Carrot-Mushroom Lasagna

Brother-Bug has long had a strong distaste for cooked carrots in almost all incarnations. However, last week I made a soup with grated carrots as a base and he was enchanted. He decided he wanted a lasagna with grated carrot as a main ingredient. I had to think about it for a while, but eventually I came up with this recipe. It's not at all a traditional Italian lasagna, but it's really tasty.

I used whole wheat lasagna noodles, but my preference here would have been to use fresh sheets of pasta. Sadly I was out of sheets, and didn't get to our favorite local pasta shop to grab some.

Carrot-Mushroom Lasagna

 1 pound lasagna noodles or fresh pasta sheets, cooked

2 cups milk
2 bay leaves
3 cloves of garlic, minced
1 sweet onion, chopped
4 cups button mushrooms, chopped
3 cups grated carrot
1/4 cup butter
1 tsp. dried basil
1 tsp. dried parsley (you can use fresh instead...I didn't have any fresh)
3 tbl. flour
1 cup grated parmesan cheese
Salt & Pepper to taste

3 cups grated mozzerella
15 oz. ricotta

Filling:
Heat the milk with the bay leaves until it simmers. Do not boil. Simmer for 2-3 minutes.

Melt half the butter in a large frying pan. Add the garlic, onion, and dried herbs and saute for 2 minutes. Add the mushrooms and carrots and cover. Cook on medium heat until the mushrooms have cooked down, releasing their juices. Add the rest of the butter and sprinkle the flour over the mushrooms. Stir the flour in till smooth, coating the mushrooms and carrots. Remove the bay leaves from the milk. Pour the milk over the mushrooms, stirring throughly till smooth. Stir in 3/4 cup parmesan cheese. Add salt & pepper - because there is no salt added to the noodles or ricotta, you might want to over salt the filling a little bit.

Assembly:
Preheat the oven to 350.

Grease a baking pan. Stack a layer of noodles, 1/3 of the carrot-mushroom filling, and a sprinkle of mozzarella. Spread another layer of noodles and spread the ricotta over. Pour the next 1/3 of the carrot-mushroom filling over the ricotta. One more layer of noodles, the remaining carrot-mushroom mixture, and the rest of the mozzarella and paremesan. Bake in the oven for 45-60 minutes, or till the cheese is golden. Allow to cool for 10-20 minutes before serving.

We served this with a spinach salad. As I was making it, I was unsure. Carrot lasagna? Really? But it turned out really good. Everyone enjoyed it and cleaned their plates.


Wednesday, May 9, 2012

Recipe: Crackling Cheese-Chive Muffins

"Warm and plump as fresh baked muffins..." (Charlotte Pomerantz)
This morning called for something more than cereal or scrambled eggs. The day called for Muffins. So Sister-Bug and I whipped up a batch while Brother-Bug slept in.

Two other excellent reasons to make muffins:

1) You have sour milk. Like I wrote about here, sour milk has a magical effect on the consistency of baked goods like muffins, quick breads, and pancakes. And why waste that potential?

2) Mixing muffins is an easy project to do with a little kid. Muffin batter is very flexible and forgivable. Once you get a general recipe down you can add and subtract, and your toddler can pour in too much baking powder...and you can still save it and come out of the experience (usually) with something edible.

These are our favorite muffins, and a wonderfully flexible recipe. Because they are savory they make a good addition to any meal and I've seen them disappear at many potlucks. My mom made a similar muffin when I was young and I've kept it and adapted it for our days when we just need muffins for breakfast - like today.

I used Lonesome Whistle's Red-Fife Wheat Flour and Buckwheat Flour which gave this particular batch of muffins a particularly rich flavor and a wonderful crumb. The millet is for texture fun (as well as the wonderful nutrition found in millet). As the muffins bake, the millet softens a little and toasts which is what makes these muffins "crackling" - the millet pops while you chew which is really fun! You can use any flour combinations, but at least 1 cup must be a whole grain flour or the texture will be really strange. I like a sharp cheddar and chives best, but only fresh chives. However, any combination of cheese and herbs will work, and it's fun to play with flavor potential.

Sister-Bug considers the implicatons of muffin batter.

What else could you add? Bacon or ham bits? Blue cheese instead of cheddar? Roasted red pepper bits? Flax seeds, bran, wheat germ, or other nutritional delights? Rye flour and caraway seeds? So many possibilities.


It's the fresh chives that really make this recipe so good.
Crackling Cheese-Chive Muffins

2 cups flour (combined whole wheat, other whole grains, and a little white to keep it light)
4 tsp. baking powder
A pinch of salt
1 1/2 cups sour milk or thinned yogurt
2 eggs
1-3 tbl. fresh chives (or other herbs)
2/3 cup millet
1 cup grated cheese (sharp cheddar or ??)
3 tbl. melted butter (or vegetable oil)

Preheat the oven to 400 degrees.

Mix the dry ingredients and make a well. Add the milk and eggs and beat throughly. Add the chives, millet, and cheese mixing till just combined. Stir in the butter.

Spoon into muffin tins and bake until a toothpick comes out clean - about 20 minutes. Eat warm, eat cold, eat plain, eat with butter... Just eat them quickly before your kids inhale them!

Just coming out of the oven...

Baking in Cast Iron? I always bake my muffins in my cast iron pans. They are a bit of an investment, but they are really worth it! Preheat the pans with the oven and use a basting brush to grease each muffin cup. Spoon in your batter and bake as usual. Because your muffin cups are hot iron, they bake the bottom of the muffin - making the whole muffin crisp around. And as long as you wipe them up right away and don't use soap on your cast iron (EVER), they are clean and back in the cupboard very quickly. 


Wednesday, August 31, 2011

August Kindergarten Review: Food

In lieu of formal curriculum, each month we choose a subject (or I choose a subject) and make that the focus of our learning projects for the month. Brother-Bug is kindergarten-aged (more or less), so our topics are broad and simple. I try to keep them easy to work into our day and fun to play around with.


For the month of August we learned about Food. This was a particularly easy one for a family deeply immersed in whole food eating, local food, canning, and who all love cooking. As the month progressed it was fun to see Brother-Bug take on more and more of the food challenges, and his awareness of what I was serving him at meals (and why) deepened as well.

We started off with a Preschool Lesson Bin from our local library all about food - a collection of a CD, some puppets, a DVD, and about 10 books all centered around Food. It was a good start.

We read some great books and did some excellent projects.

Muzzy kicked us off with her great Ice Cream Project! Brother-Bug said this was his favorite because he got to eat ice cream at the end.

Brother-Bug samples the produce
We also enjoyed blueberry picking at Adkins Farm, and the resulting work making jam, freezing berries, drying more berries, and making pie. Mmmm...pie....

We made our own mozzarella one day, using Ricki Carroll's book and instructions. It's fun and easy to make, and very satisfactory. Brother-Bug said he really liked the kneading and pulling necessary to make mozzarella. And when we hung the whey up to make ricotta (which didn't really turn out) he liked how the dripping was "cheese pee".

With the leftover whey, we made bread! We measured, mixed, kneaded, let sit, punched, and waited, and finally baked. It was perfect with honey. We talked about how the yeasts work (they make the bread fluffy by eating sugar and then 'farting'...lots of giggles there!), how to be safe with the oven, and other general learning tasks presented themselves - measuring math and so on.


So far, all these projects are just things that happened in the course of our days. Part of our rhytem of August. The cheese was made because we had extra milk. The bread was made because we had the whey from the cheese.
Kneading, kneading, kneading...

We talked about the 3 Gs - something I have written about on this blog. We cut out food pictures from magazines and made a 3 Gs collage. Along with the collage we discussed healthy eating choices, the importance of balancing healthy food with treat food, eating a rainbow of colors...and had fun with scissors and glue!

We had a field trip to a local fresh pasta maker - Pasta Plus - and learned about how food is produced in a factory. Brother-Bug got to cut his own sheets of pasta which we later had for dinner. Super tasty.

In our library bin there was a Sesame Street DVD about funny food songs, which was a favorite. Brother-Bug got to write a first 'Media Report' about it - dictating to me while I asked him questions. It was a real challenge for him to put his thoughts together about the movie, and I was thrilled that he was very excited about that particular challenge. When we thought back about the month's activities, he specifically mentioned enjoying the challenge of the report.

Our major math activity was making a Bar Graph of likes, dislikes, and favorites. Brother-Bug worked with his friend T, asking people in their world yes/no questions and filling in the graph I made with stickers. After the information gathering was done, we looked closely at the graph, asking several questions - is there anything that everyone likes, but is not anyone's favorite? How many people like ice cream and how many like celery? Which has the most likes? And so on.


Our graph - green indicates 'like', yellow indicates 'dislike', and red indicates 'favorite'.

To finish up the month we read Everybody Cooks Rice and located the countries represented on our globe with post-its. We also read The Life of Rice, about how rice is grown in Thailand and the culture that surrounds that staple crop.

To augment, I found some websites with food-related games for when he really wanted to play computer games. There was no game or site that stood out as excellent, so I'm not going to bother sharing them here. I threw them in mostly to keep consistent with our Food theme. 

We had a great time with all of this, and since we are only in kindergarten, I don't worry too much about retention and the ability to regurgitate information. It's enough for me that we are learning and doing and enjoying - forging pathways of life long learning and experiencing all that we can. That's what it is all about for me.

===

Nest month we leap into maps and how they work - playing with geography! I can't wait to see where the month's adventures lead us!


Friday, May 13, 2011

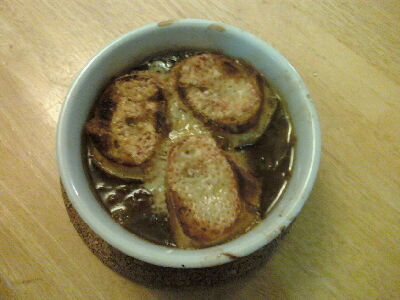
Recipe: Slow Cooker French Onion Soup

It's one of my favorites - rich beef-broth, savory onions, browned cheese... Yum. Luckily it is also one of the easiest things I make in our kitchen. The secret is in the slow cooker.

I never used to make french onion soup because I don't particularly enjoy caramelizing onions. The amount of slow stirring over the pan of onion aromatics... not really a cooking task for me. And then came the realization of Slow Cooker Caramelized Onions. Let me lay this out for you.

I say this is "almost instant" but in reality it takes a day or so to complete. However, most of that time is in the slow cooker, so it doesn't really count. You just have to think ahead a bit.

1) Throw some beef bones and about a quart and a half of water in your slow cooker the night before you want your soup. Add a potato for extra potassium if you wish it. Make sure the bones are covered with water. Turn it to high and leave it over night.

2) The next morning, pour the broth into a container to store in the fridge for the day. Discard the bones. Save the potato and have it for lunch. YUM.

(You can skip these two steps and buy a quart of pre-made beef broth at the store. But it won't taste quite the same.)

3) Slice up enough onions to OVERFILL your slow cooker. I use my food processor for this. You can do it by hand. Either way, you want enough to fill the slow cooker above the brim.

4) Add the onions and a stick or two of butter (8-16 oz.) to the slow cooker. I usually put half the butter in the middle, and half on top. Figure out how to lid this pile - I had to cover mine over with tinfoil this last time. Too many onions for the lid to fit!

**NOTE: If you don't want extra caramelized onions for later, fill your slow cooker only about half way with onions and reduce the amount of butter.

5) Turn the slow cooker back on (high). Leave it for the day. Stir it once or twice if you get the opportunity. Or just let it go. Whatever.

6) 20-30 minutes before you want to eat, open up your slow cooker. You should have lovely onions - a whole pile of them! Way more than you need for your soup. Take about 2/3 of the onions and freeze by the measured 1/2 cup on a cookie sheet or in muffin tins. Keep these guys in the freezer for caramelized onions in an instant. They thaw fast to be added to burgers, quiche, omelets, pasta sauce, whatever! That's a win. You can put them to the side and get them in the freezer after dinner or anytime in the next couple of hours.

**I am compelled at this point to bring up my dad's complaint with this method. You end up with caramelized onions that are more steamed than fried and therefore do not have the crispy caramel bits. I agree with him. I also like how simple it is to caramelize these guys.

7) Add the following to the remaining 1/3 of onions in the slow cooker:
Approximately 4 cups beef broth
1/2 cup (or more) dry white wine
4-5 fresh thyme sprigs or 2 tbl. dried thyme
Salt and pepper to taste

8) Lid the cooker and let it all warm up.

9) Serve the soup into oven-safe bowls. Top each one with some crusty baguette-type bread and slices of Gruyere cheese (Parmesan is okay in a pinch). Broil until the cheese is toasty and serve.

That's it. Lots of steps, but (with a food processor to cut the onions) no step takes more than 10 minutes. Most steps take more like 2 minutes.

Eat up!