Showing posts with label heirloom grains. Show all posts

Wednesday, May 9, 2012

Recipe: Crackling Cheese-Chive Muffins

"Warm and plump as fresh baked muffins..." (Charlotte Pomerantz)
This morning called for something more than cereal or scrambled eggs. The day called for Muffins. So Sister-Bug and I whipped up a batch while Brother-Bug slept in.

Two other excellent reasons to make muffins:

1) You have sour milk. Like I wrote about here, sour milk has a magical effect on the consistency of baked goods like muffins, quick breads, and pancakes. And why waste that potential?

2) Mixing muffins is an easy project to do with a little kid. Muffin batter is very flexible and forgivable. Once you get a general recipe down you can add and subtract, and your toddler can pour in too much baking powder...and you can still save it and come out of the experience (usually) with something edible.

These are our favorite muffins, and a wonderfully flexible recipe. Because they are savory they make a good addition to any meal and I've seen them disappear at many potlucks. My mom made a similar muffin when I was young and I've kept it and adapted it for our days when we just need muffins for breakfast - like today.

I used Lonesome Whistle's Red-Fife Wheat Flour and Buckwheat Flour which gave this particular batch of muffins a particularly rich flavor and a wonderful crumb. The millet is for texture fun (as well as the wonderful nutrition found in millet). As the muffins bake, the millet softens a little and toasts which is what makes these muffins "crackling" - the millet pops while you chew which is really fun! You can use any flour combinations, but at least 1 cup must be a whole grain flour or the texture will be really strange. I like a sharp cheddar and chives best, but only fresh chives. However, any combination of cheese and herbs will work, and it's fun to play with flavor potential.

Sister-Bug considers the implicatons of muffin batter.

What else could you add? Bacon or ham bits? Blue cheese instead of cheddar? Roasted red pepper bits? Flax seeds, bran, wheat germ, or other nutritional delights? Rye flour and caraway seeds? So many possibilities.


It's the fresh chives that really make this recipe so good.
Crackling Cheese-Chive Muffins

2 cups flour (combined whole wheat, other whole grains, and a little white to keep it light)
4 tsp. baking powder
A pinch of salt
1 1/2 cups sour milk or thinned yogurt
2 eggs
1-3 tbl. fresh chives (or other herbs)
2/3 cup millet
1 cup grated cheese (sharp cheddar or ??)
3 tbl. melted butter (or vegetable oil)

Preheat the oven to 400 degrees.

Mix the dry ingredients and make a well. Add the milk and eggs and beat throughly. Add the chives, millet, and cheese mixing till just combined. Stir in the butter.

Spoon into muffin tins and bake until a toothpick comes out clean - about 20 minutes. Eat warm, eat cold, eat plain, eat with butter... Just eat them quickly before your kids inhale them!

Just coming out of the oven...

Baking in Cast Iron? I always bake my muffins in my cast iron pans. They are a bit of an investment, but they are really worth it! Preheat the pans with the oven and use a basting brush to grease each muffin cup. Spoon in your batter and bake as usual. Because your muffin cups are hot iron, they bake the bottom of the muffin - making the whole muffin crisp around. And as long as you wipe them up right away and don't use soap on your cast iron (EVER), they are clean and back in the cupboard very quickly. 


Tuesday, March 6, 2012

A Yummy Bowl

Here is the Willamette Valley we have a local chain called Cafe Yumm. Their Yumm Bowls make up a fair part of the kids eating-out experience. They key is their amazing Yumm Sauce. Tasty.

But we can't afford to eat out often, and I love to make things myself. A dear friend gave me her recipe for what she calls Yummish Sauce. Be patient, we will get there.

A Yumm Bowl spread is a great thing to serve to large groups of diverse eaters, especially when kids are involved. It's super basic and pretty much infinitely adjustable. It falls into the 3 Gs without any effort at all.

Here we go, from the bottom of your (large) bowl up:

Greens of some kind - mixed salad greens, cooked kale, chard, or collards, spinach, steamed nettles, steamed broccoli....

Cooked grain of some kind - brown rice, millet, quinoa, wheat berries, barley, corn chips.... Or skip the grain if you don't do grain.

Cooked beans - our last bowls had Lonesome Whistle's Rio Zapé beans. So good. But any bean will do. Black, white, red, pinto, cranberry, garbanzo...

(You begin to see how infinitely adaptable these are, right?)

Okay, that's the base. Traditionally this is vegetarian, but I've been known to throw in left over meat that was available - some slow-cooked chipotle goat leg was incredible. Extra taco or burrito meat, turkey, chicken, whatever. I think pulled meats work better than others, but that's more of an aesthetic choice than anything.

All kinds of other stuff goes on top:

Cheese
Sour cream
Green onions
Avocado
Salsa
Black Olives
Tomato
Fresh Basil or Cilantro
More greens
Jalapenos
Bell peppers
Anything else your imagination inspires you to try...

On top of all that, we slather on the Yummish Sauce. Mix it up (or not - your preference) and watch it get inhaled out of the bowls.

What? The Sauce recipe? But of course!

Yummish Sauce

This makes about 2 1/2 cups, which we will use up in a couple of days. However, it freezes really well, so making a little extra (or a lot extra...I usually make about a gallon at a time) and popping containers in the freezer means having a go-to snack and dinner option.

Blend in a food processor:
1/2 cup oil - I usually use Olive Oil
1/2 cup almonds
1/2 cup cooked and drained garbanzos
1/4 cup soy beans
4-6 garlic cloves

(I've successfully used cashews in place of the almonds, and other white type beans, like Arikara Beans, in place of the garbanzos and/or soy beans. Like the bowl recipe, this is only limited by your imagination and what is in your cupboard.)

Slowly add, one at a time:
1/3 cup nutritional yeast
1/2 cup water
1/3 cup lemon juice
1 tsp. salt
1 tsp curry powder
1 tsp. soy sauce or Braggs Liquid Aminos

(Here I have tried other herbs and spices. When Sister-Bug had broken her clavicle, I blended up a bunch of sauce with Comfrey tea and leaf for its bone healing properties. I plan on putting nettles into the next batch...and who knows what else!)

Blend well with each addition. Adjust the salt and spices as desired. Adjust the thickness with water and oil - I like to make mine like a thick dip, knowing it's easy to thin later and makes a nice dip or sandwich snack if it's a little thicker.

This is a guaranteed kid-pleaser...or has been with every kid I have ever fed it to!

Monday, March 5, 2012

A Collection of Soup

Over at TidyMom they are collecting soup recipes. I think this is brilliant, because I love soup. There is a give away also, but my motivation is mostly my love of soup. I looked back over my posts and here are all the soup recipes I have posted about. All tried and true favorites - which one will you try?

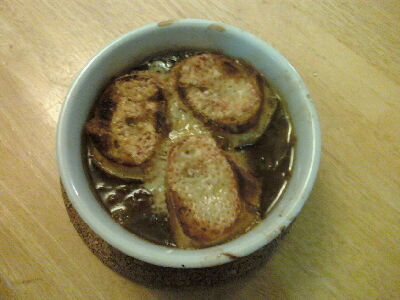
Almost-Instant French Onion Soup - this relies on the magic of a slow cooker. It's not instant in that you have to start it the night before. It is instant in that your total cooking time is 20 minutes with a food processor. And you end up with extra caramelized onions, which is always good.

*
*
*
Dinosaur Bean Soup - a creation I made when working with some heirloom beans from a local farmer. The first part of the post is about the bean and grain CSA that I belong to (and love). The soup recipe is near the end.

*
*
*
Sunshine Soup and Ham & Barley Winter Stew - two recipes in one post! The sunshine soup is a bright soup with all red, yellow, and orange ingredients that we made for Winter Solstice. The Ham & Barley Stew is just what is says it is. Both these recipes feature more heirloom beans and grains from my CSA. The flavors of these ingredients is amazing and worth tracking down if you have time and resources.

*
*
*
Summer Cucumber Soup - yesterday it was warm here, and sunny! We worked outside for a while, transplanting raspberry canes, and I got to thinking about all the tasty summer foods in the nearing future. This recipe is not appropriate now...but will be in just a few months. And SOOOO refreshing on a summer day!

*
*
*

Sweet Potato & Beef Stew - using that earlier technique of slow-cooker caramelized onions, I made this amazing stew a couple weeks ago. There is no picture because we ate it to fast. There were no left overs.

*
*
*
So those are the soup recipes I've posted here. I hope you try them out, enjoy them, and let me know. And really - give-away or no give-away, there are some amazing recipes in the Soupapalooza post I linked to in the beginning. This is the official line: "Come join SoupaPalooza at TidyMom and Dine and Dish sponsored by KitchenAid, Red Star Yeast and Le Creuset!" The give-away ends today, but that is no reason to ignore the cache of amazing recipes. Check them out.

Friday, February 10, 2012

So You Forgot To Soak The Beans?

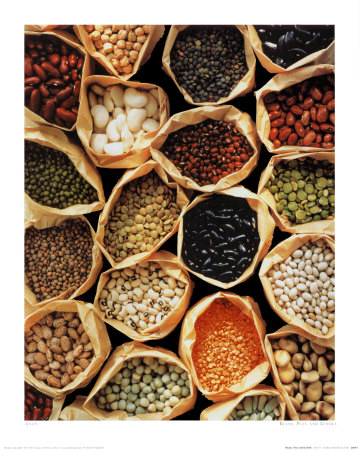
So many beautiful beans in the world...
This is a perpetual issue for me - I can remember to get dinner going early enough, but I think I have remembered to give my beans am overnight soak maybe half a dozen times in my adult life. For years this frequently prevented me from cooking bean recipes.

Finally I read Mark Bittman's How To Cook Everything, in which he does not insist on pre-soaking beans.

"[The myth of soaking beans...] is the most egregious, and the most harmful , because it has given millions of people the idea that beans must be prepared well in advance. Although soaking speeds cooking, it does not do so significantly. If you soak most beans overnight you will shave fifteen to thirty minutes off the cooking time."
(Bittman; How to Cook Everything; pg. 500)

Equipped with his ideas I began to explore cooking beans in a satisfactory and short-sighted way that works for me.

Bittman's recommendation is to cover the beans with water, bring to a boil, cover loosely, and simmer (stirring occasionally) till done.

I tried this with several types of beans and found it worked, but didn't quite cook the beans to my taste. My adaptations work as follows:

Warm water in a tea kettle and pour over rinsed beans. Lid the soaking beans and let sit for 30 minutes or more. Strain and rinse.

Stove Top:
Put the beans, a teaspoon of baking soda (I use about one teaspoon per cup if dry beans - very approximate) and ample water in the cooking pan. Turn on high heat. Bring to a boil, reduce heat to medium low and simmer till the beans are tender. This should be between 30 and 60 minutes, depending on the beans. I never time them, but instead check them periodically.

Slow Cooker:
Place the beans, baking soda, and ample water in the slow cooker. I then turn mine to high for 6 hours. This might make my beans a little mushy, but I usually check them frequently throughout the day if I am home and turn the cooker off when they are done.

This works especially well with fresh beans, such as the heirlooms I have been playing with from Lonesome Whistle. And if you are cooking beans, make a double batch. Take half of the soaked beans and freeze them in their soaking water. They are ready to cook when you have even less time than usual!

===

As an aside, I highly recommend Bittman's book. It's an excellent go-to for any and (almost) all cooking questions.

Sunday, January 22, 2012

Adventures With Purple Barley

Last night I put 2 cups of Lonesome Whistle's Purple Barley and about 6-7 cups of water in my slow cooker. I've been meaning to try this since my success with the Scottish Oats in the slow cooker. Right before I went to bed I set it on low for 8 hours. This morning - warm and tasty barley cereal ready to go! We added butter, milk, and sweetener as we served. Some of us had it with honey, some with molasses, and some with brown sugar. Everyone enjoyed it - even Sister-Bug who often refuses to eat things that don't have Gorgonzola in them. This is one of my new favorite ways to deal with breakfast and my hungry little bugs who often can't even wait for eggs to scramble! How perfect to have breakfast ready to go, the moment they are up and clamoring for food.

A red bowl of slow-cooked purple barley.

My other success with the purple barley was the following recipe - made up largely because my mom gave me a container of Mascarpone and I didn't have any immediate inspirations of what to do with it. Leafing through old cookbooks I found a recipe for risotto with Mascarpone and Pancetta. The idea struck my fancy, and this recipe was the result. It seemed to be kind of a risotto/pilaf hybrid and I'm just not sure what to call it. It is amazingly rich and warming. Papa-Bug, in particular couldn't have enjoyed it more. 

Decadent Barley with Mascarpone

1/2 onion
5 tbl. butter
2 cups purple barley
1/2 pound ham cubed (I used a nitrite-free ham slice from Deck Family Farm...soooo good)
5-6 cups chicken broth
8 oz Mascarpone cheese
4 tbl. Fresh parsley
5-7 Green onions

Heat the butter in a large, heavy bottomed frying pan. Chop the onion and saute until clear. Add the barley and continue to saute for another 5-7 minutes (in making risotto you wait for the rice to look 'clear', which didn't happen with the barley).  Add the ham and toss to combine. Add the chicken broth and cover. Bring to a boil, reduce to simmer, and cook until the barley is done through - this took about an hour. Remove from heat and allow to cool for 15-30 minutes (this is essential, as it keeps the Mascarpone from separating too much). Just before serving, mix in the minced parsley and green onions and the Mascarpone.

My thanks go out to my mom for putting the Mascarpone in my fridge, causing the creation of this pleasing recipe!

Monday, January 2, 2012

Two Soups for You

Though I haven't been doing much writing here, I have still been cooking, and cooking a lot! Partly holiday feasts and partly the exciting beans and grains, and mostly that we get hungry and must eat good food.

Among other things, I put together these two soup recipes and since both use ingredients from Lonesome Whistle, I wanted to share... And I really love to share the recipes I create. Recipe creation feel like such an art form, and one that benefits most when the recipes go out into the world.

===

Sunshine Soup

I made this with Brother-Bug and his best friend when we gathered to call back the light at the (close to the) Winter Solstice. We chose ingredients that were red, yellow, and orange to help us see the return of the sun. It was a good match with an Irish Soda Bread and some broccoli. We shaped the bread like a sun, and the broccoli represented the coming summer trees. It was a tasty and magic meal!

Soda Bread Sunshine!

1/2 Butternut squash
3 carrots
5 c water
2 T veggie bouillon

Cook squash, carrots, water and billion till the carrots are soft. Blend or mash till smooth.

Add to the soup purée:

1 1/2 cups Vermont Cranberry beans, precooked
1c frozen corn
About a teaspoon each of powdered ginger & mustard
1/2 teaspoon grated nutmeg
Salt and pepper to taste

Heat through till the corn and beans are warm and the spice flavors have mingled a bit.

Serve and enjoy. Sing "Here Comes the Sun".

===

Ham & Barley Winter Stew

Close up of Purple Barley - gorgeous, right?

1 ham hock
1 cup purple barley
2 sweet potatoes, cubed
1 white potato, cubed
2-3 tablespoons smoked paprika
Water to cover
Bay leaf
Parsley
Salt & Pepper

I made this in my slow-cooker - any excuse to use the Christmas present, right? I put all the ingredients in, covered them with water, and cooked it on high for about 5 hours. Before serving, pull out the hock and strip any clinging meat into the stew. Adjust the seasoning.

Serve with crusty bread.

===

I'm thinking of grinding some of the Dakota Black Popcorn in my grain mill, and seeing how it comes out as cornbread....

Wednesday, November 16, 2011

Black & White Popcorn Balls

Over at Lonesome Whistle Farm, Jeff & Kasey grow Dakota Black Popcorn. It's beautiful. If you find your way down to the Holiday Market, Kasey might just have her black popcorn maker out, popping black popcorn, and you can try a bag of fresh popcorn with her fantastic seasoning.  I recommend it.

On Halloween, Brother-Bug had a friend over for the day and I wanted something fun to do, special for Halloween to divert some of their not-so-pent-up excitement about tricks and treats and costumes. It occurred to me that black popcorn is really just the right thing for a Halloween project, and we were lucky enough to still have some from last year!

Popcorn balls are easy to make. We looked online and found this recipe that didn't call for any corn syrup. The rest we can show in pictures...

Look at that gorgeous corn! Doesn't it look so Halloween-ish!?

As they watched the popping, they were egging the corns on; "JUMP! Jump you corns!"

All popped up and ready to ball - I love the color contrast of this corn. So fun.

I don't have pictures of us making the popcorn balls - it was a little sticky to be using phone or camera. But we all know that sticky projects are the funnest projects. Plenty of popcorn was eaten in the process, molasses dripped and hardened on the floor. The black and white popcorn was announced very tasty.

Okay - the dark molasses I used killed the black-and-white scheme. But they were really tasty AND fun to make!
===

As partial payment toward the Bean and Grain CSA, I write about Lonesome Whistle Farm, their products, and what I do with them in my kitchen. Hope you enjoy! I know I do!