You can Google "freezer paper shirt" and this page will come up. Of those possibilities, I like The Stay at Home Artist the best, but look around and see what you can find.
What I am writing about here is making these shirts with kids. With some preparation, it is a super easy project that even Sister-Bug could participate in, and yields a product that they feel really good about. Freezer paper shirts are great for giving new life to stained clothes. Brother-Bug's "new" elephant shirt was one we pulled out of his drawer; it was looking dingy and had a couple of unsightly bits. Carefully placing the elephant stencil over the stains made this old shirt new and exciting. I have saved plenty of clothes from the rag-bag with a little time and ingenuity and the appropriate application of a freezer paper stencil.
Essential number one: Pre-cut the stencil! This is slow and detailed work with a sharp craft knife. Better to get these ready during a quiet moment when excitement to get the project going isn't bouncing all around you.
.JPG) |
| Shirts in process - here we are waiting for the first color of paint to dry. |
.JPG) |
| A birthday present for a spy/detective obsessed friend of Brother-Bug. |
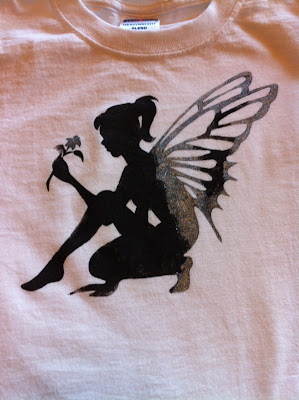
Essential number three: Stick with one or two colors of paint, especially if you are working with younger children. In our project we used black to make outstanding silhouettes, and highlighted with the silvery metallic. Everyone was happy. We could have used my whole rainbow of fabric paint, but it would have meant a constant rotation of brushes needing to be washed, new paint colors to distribute, and so on. The older the kids, the more paint colors I will get out for play.
 |
| Sistre-Bug's shirt - she got a very basic stencil, the easier for her to paint. Yes, she painted this with very little help! |
Essential number four: Have a thing to do while you wait for the paint to dry - away from the work space. While we waited we played outside. As soon as the paint was dry enough I pulled the paper off and carefully hung the shirts on a high laundry line. It's so hard for little fingers to resist checking the paint to see if it's dry.
 |
| Brother-Bug's renewed elephant shirt. So very cool. |
When cutting out relief - like the insides of letters or the tracing of fairy wings, I have my own method. I'll attempt to describe it here, but I don't have pictures, so bear with me. In the past I always meticulously saved each little relief piece (the inside of the "D" in detective or each white piece in the fairy wings) and did my best to place them accurately.
 |
| See those wings? Each white bit needs to be saved and applied as its own piece. Meticulous and antsy work... |
This time, I cut the wing relief in one piece, connecting each piece with a, eighth inch of freezer paper - truly stencil like. With the tip of my iron I anchored each piece in just one small area. Then with my thread-snipping scissors I went through and cut out the eighth inch connectors, leaving the true relief pieces in place as individual pieces. Once all the connectors were removed I ironed the true relief pieces down fully.
A couple more things:
*Make sure you follow the directions for setting the fabric paint. Most needs to be heat set with a dryer or an iron. Once it is well set these shirts are as washable as any other shirt.
*Pick something simple to start - words and fairy wings are very time consuming and potentially frustrating. If you haven't done this before, go for something fairly basic.
*I find it easiest to pull the paper off when the paint is barely tacky. When I've pulled it off completely dry paint it is much more difficult. Have a good pair of tweezers to lift of small paper bits.
*You can layer colors and even stencils! Your creativity and ingenuity is the limit here.
 |
| Look at this. They are so proud of themselves! And they look so sharp... |
Have fun. Create well. The holidays are coming up... Who do you know who needs an awesome custom t-shirt?
Is there any chance you'd consider doing it again with me? I want to make baby onesies. I've been putting it off because I want someone more experienced than I to do it with.
ReplyDeleteAbsolutely! There are a couple that we want to get made for Holiday Presents. The kids LOVE making their own shirts and would mind another go-round.
DeleteYour freezer capers are looking so very pro! Great work.
ReplyDeleteThe fabrics used in all shirts are of best worldwide quality. One can choose any style through the user friendly interface of the internet website. A lot of styles as well as shirt designs are available for online clients.Tshirt Design
ReplyDeleteOver the years I’ve ordered dozens of t-shirts that were printed with less than expected quality. Last year my company printed some t-shirts with PCA Delta in Pompano Beach FL, and they were great. I’ve been printing with them ever since. If you need t-shirts or other apparel printed go to http://www.pcadeltaprinting.com/ I strongly recommend them.
ReplyDelete